

The Comprehensive Guide to Caring for Tillandsia – Air Plant
 המוצר מהמדריך זמין באתר
Tillandsia kit — 2 air plants in a glass jar with pebbles
129.00 ₪
Tillandsia is an air plant from the bromeliad family. Instead of planting it in soil, it is displayed on a shell, wood, stone, or an open container. Its short roots are primarily used for anchoring, while the leaves bear tiny scales that help absorb water and dissolved substances.[1][2][3]
The Deco Garden product is a mix of Tillandsia species without individual identification. Therefore, this guide is intentionally kept at the genus level: it provides a safe foundation, but the leaf color, scale density, and the drying rate of your specific unit determine the precise adjustments needed.[1][2][3]
Tillandsia Quick Care
| Light | Bright, indirect light; acclimate gradually and protect from intense sun behind glass.[1][2] |
|---|---|
| Water | Thoroughly wet all leaves, then shake and drain. Light misting alone is not always enough.[1][3] |
| Drying | Return to the shell only after the plant is dry to the touch; water trapped at the base risks rot.[1][2] |
| Ventilation | Open space with gentle air circulation; not a closed glass container and not in front of an AC vent.[1][3] |
| Temperature | Warm home environment; protect from cold, and keep drier in cooler temperatures.[1][2] |
Placement: Light without burn
Choose a spot near a bright window where the light is filtered. An east or west-facing window with protection from strong sun is suitable for most units; in a south-facing window in Israel, it is advisable to keep the plant slightly away from the glass or filter with a curtain.[1][2]
A green and smooth mix tends to come from a more humid, shaded environment, while a silvery and hairy appearance usually indicates more leaf scales and adaptation to dryness. This is an indication of adaptation, not species identification: start with indirect light and increase only gradually if there is no bleaching or crispy edges.[1][2]
How to water correctly
Gently remove the Tillandsia from the shell if possible, wet or soak all leaves in lukewarm water, and ensure water reaches the entire plant. Then gently shake and place upside down or on its side in a ventilated spot until fully dry.[1][2][3]
There is no single watering schedule that fits every home. Light, heat, air humidity, air movement, and scale density change the loss rate. Leaves that curl inward, a dull hue, and dry edges sometimes indicate a deficiency; a soft or dark base and an unusual smell indicate prolonged moisture.[1][2][3]
Water quality matters
Clean rainwater or filtered water is a good choice. Hard water may leave a mineral deposit on the leaf scales; if using tap water, watch for a persistent white layer and change your water source when possible.[1][2]
Water should be at room temperature. Do not use distilled water exclusively along with random and strong fertilization; the goal is gentle and consistent wetting without salt accumulation.[1][2]
Shell, container, and ventilation
A shell is a display base, not a water tank. Keep the opening clean and accessible so the plant can be removed, watered, and dried. If the Tillandsia is attached, tilt the entire item after wetting until no drops remain at the base of the leaves.[1][3][2]
Do not close a wet Tillandsia in a terrarium. Good air movement accelerates drying and reduces the risk of rot and foliage diseases, but a constant draft from an AC unit may dry it out too quickly.[1][3][2]
Fertilization: Little and only when growing
Tillandsia does not need heavy fertilization. If you fertilize, use a fertilizer designed for bromeliads or orchids, diluted weakly according to the manufacturer's instructions, and only when the plant is receiving appropriate light and water. Excess salts on the leaves can be more harmful than a temporary deficiency.[2][1][3]
Do not spray concentrated fertilizer on a dry plant or leave fertilizer solution inside the shell. After fertilizing, follow the same rule: drain and dry completely.[2][1][3]
Flowering and the pups that follow
Most Tillandsias flower once in their life cycle. After flowering, the mother plant may produce pups (offsets) at the base. This is a natural process and not a sign of failed care.[1][2][3]
Keep the pups attached until they are established; they can be grown as a clump or gently separated only when they are large enough and gripping well. Do not rush to remove the mother plant as long as parts of it are green and nourishing the group.[1][2][3]
What research reveals about leaf water absorption
Anatomical and physiological research published in Protoplasma examined three Tillandsia species and found a link between the structure and composition of leaf scales and water absorption through the foliage. The research did not test the commercial Deco Garden mix, so one cannot draw an exact watering dosage for your unit from it.[4][1][2]
The cautious practical conclusion is clear: the leaf is a central water organ, so full wetting of the foliage is important; meanwhile, variation between species explains why one Tillandsia dries quickly and another does not. Observing the plant is better than following a fixed schedule.[4][1][2]
Adaptation to seasons and the Israeli home
In the hot summer, near a bright window or in an air-conditioned room, check the leaf condition and drying speed more frequently. In winter, when the light is weak and the air is cool, reduce wetting if the plant remains damp for a long time.[1][2]
After changing locations, allow the Tillandsia about two weeks of stable conditions before concluding that it needs more sun or fertilizer. Change one factor at a time to know what helped.[1][2]
Troubleshooting Tillandsia
- Sign
- Hard white layer on leaves
- Possible cause
- Mineral accumulation from hard water; not necessarily harmful.
- What to do
- Switch to clean rainwater or filtered water and check if new deposits stop appearing.[1]
Frequently Asked Questions
Does Tillandsia really not need soil?
Yes. The roots are used primarily for anchoring, and the leaves absorb water and dissolved substances. Do not plant the mix in regular compost.[1][2]
How often should I water Tillandsia?
There is no rigid number. Wet thoroughly and then water again only when fully dry, based on leaf appearance, heat, light, and air circulation in your home.[1][2][3]
Is misting alone enough?
Sometimes not. Grow guides recommend thorough wetting by spraying until runoff, rinsing, or soaking, followed by careful draining and drying.[1][3]
Can I leave it inside the shell while watering?
Only if you can drain every drop and dry thoroughly. If the plant is removable, it is safer to take it out, wet it, and dry it before returning it.[1][2]
Why is the Tillandsia turning brown?
A crispy edge corresponds more to dryness; a brown, soft base is more consistent with prolonged moisture. Check the location and texture before adding water.[3][1]
What light is suitable for Tillandsia?
Bright, indirect light. Strong sun through glass can burn, especially without gradual acclimation.[1][2]
The plant and products fitting this guide

Tillandsia Tiles – Air plant in shell, mix
The plant about which this guide is written, when in stock.
₪120.00
View productSources and verification
- Air plants care guide
- Tillandsias as Houseplants
- Air Plants — Tillandsia
- Functional architecture and cell wall composition of peltate scales involved in leaf water absorption
Updated:
🛒 המוצרים מהמדריך
הצמחים והמוצרים שהמדריך מדבר עליהם — לחיצה על כרטיס מעבירה לעמוד המוצר.
-
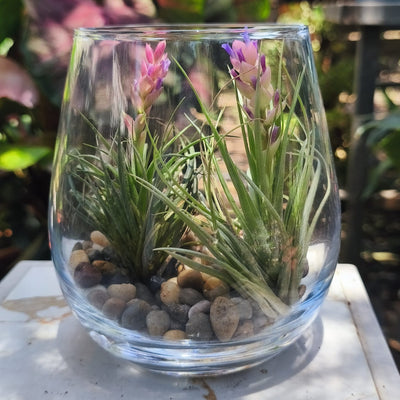 Tillandsia kit — 2 air plants in a glass jar with pebbles
129.00 ₪לעמוד המוצר
-
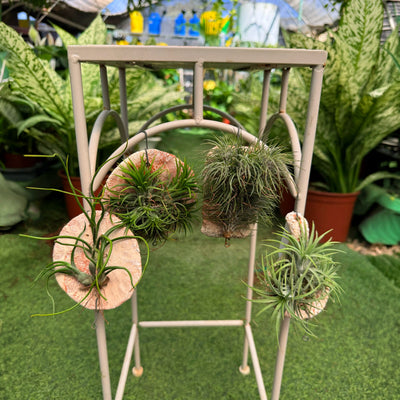 Tillandsia tiles – air plant in a seashell, mix
120.00 ₪לעמוד המוצר
-
 Migdal from the Northern Border 10 liter planting mix
14.00 ₪לעמוד המוצר
-
 Universal Fertilizer 1.2 liters
45.00 ₪לעמוד המוצר
-
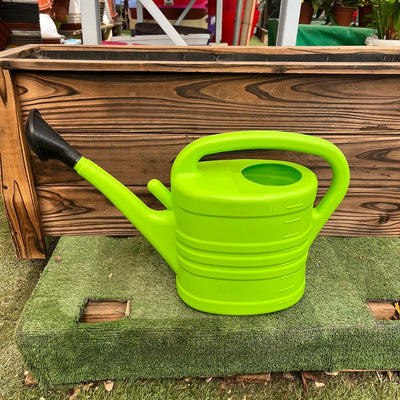 funnel
החל מ-18.00 ₪לעמוד המוצר
